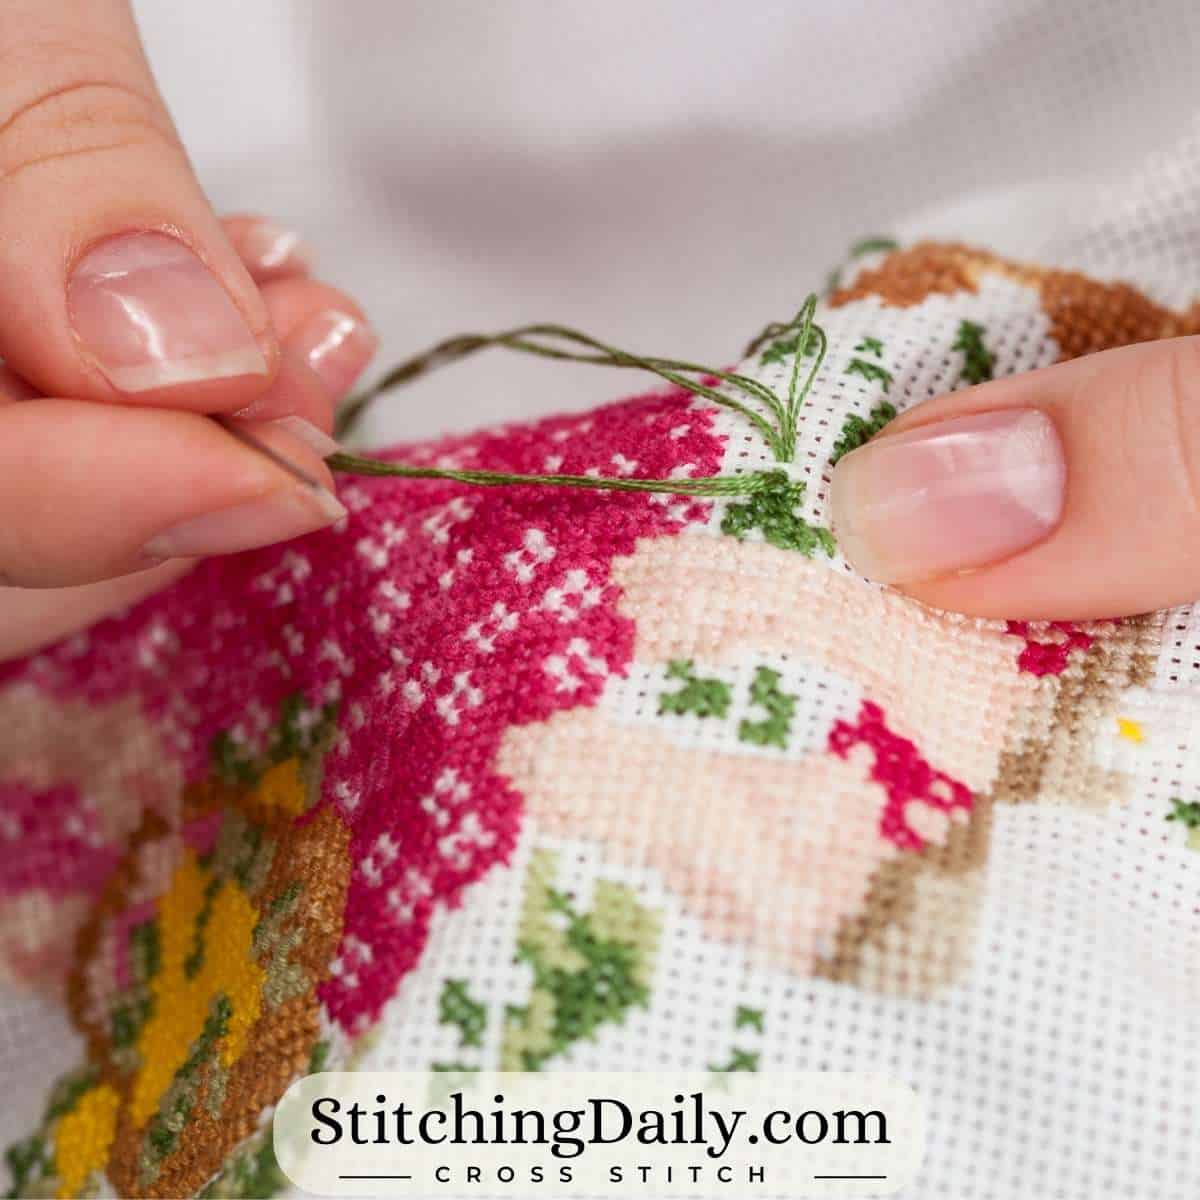
The parking method is a way to stitch a cross stitch project. (There is also the cross country method of stitching.) Parking refers to the fact that you "park" unworked threads in the spot where you will use it in the future instead of stitching it right away.
Jump to:
- Reasons to Use the Cross Stitch Parking Method
- The Only Rule in Parking Technique
- Step 1. Decisions I Make Before I Start Stitching
- Step 2. Pick your first color and stitch it
- Step 3. Park the first color in the next occurrence
- Step 4. Mark your stitches and where you parked your thread
- Step 5. Repeat Steps 2 and 3 of picking your color, stitching, parking and marking
- There's No Wrong Way to Stitch
- Parking Method Cross Stitch YouTube Video
- Cross Stitch Parking Method FAQ
- Other Parking Options
- TIP: How to keep parked threads from tangling
- TIP: Do I need to use a hoop or frame?
- Stitchers I've Learned From
- Other Method to Stitch
- Ask Me Any Questions!
Reasons to Use the Cross Stitch Parking Method
I am not an expert at using the cross stitch parking method, but I do use it in most of my projects. The main reasons I use the parking method when I'm stitching are:
- To reduce the counting errors
- To complete a section and see the design start to reveal itself
The Only Rule in Parking Technique
The only rule of parking I use is to make sure I always park in the same corner of the stitch consistently in the project I'm working on.
I park in different corners for different projects - but for each project you want to consistently park in the same corner.

Step 1. Decisions I Make Before I Start Stitching
The following decisions are things I decide when I start a new project with parking. Sometimes I change my mind midway through the project and try something new, and that's okay. But I like to start each cross stitching project with a plan in mind.
Which corner of the X to park my thread in
As I explained in the One Rule above, you want to consistently park in the same corner and start your Xs the same way throughout the entire project.
For this project, the first leg I am stitching is like the Teal leg above \.
So I am going to park in Box 3.
Where to start the design
First, you want to decide where you're going to start your design. For this project, I started in the top left corner. I often start there because my brain looks at the pattern like I'm reading a book. So I start in the top right, work to the left and then work down.
Other options to starting include any of the other corners or even a middle start. Personally, I prefer a corner start to a middle start because I like to see the design unfold as I work out from the corner towards the other corner.
What area to stitch in
I confine myself to work in a set area. For this project, I am working in a 10x10 block. That means 10 columns across and 10 rows down.
Other examples to area to stitch are:
- 20x10 block (20 columns and 10 rows.)
- 20x20 block
- 10-stitch diagonal
- A complete row across
- A complete column down
- One specific motif in the design
- Stitch any area that is not blocking off another stitch
- Any other area that works for you
I choose an area that I can easily count in and that isn't too large. If it's too large of a space and I'm parking outside of it, I might be carrying the thread a long distance or I might miscount which would cancel out one of the reasons I am parking over doing the cross country method.
Which direction to work
For this project I am going to work both across one block and down in a sort of block stair step.

The image above shows how I will be working this pattern.
I will start by stitching the orange box that is #1.
Then I will stitch blue box 2 and then 3.
Afterwards, I will cross stitch the yellow boxes in order of 4, 5 and then 6.
Finally, green boxes 7, 8, 9, and 10 in that order.
NOTE: This method is chosen just to try something different. There's no advantage to stitch this way over another - it's just a matter of personal preference.
Which section to park
On this cross stitch project I am first going to look to park my threads in the 10x10 block to the right.
If the color is not used in that block, I will then look in the 10x10 block below where I'm working.
If there's no color there, I will end the thread.
So when I'm working Box 1, I will look to park in Box 2 and then Box 3.
Step 2. Pick your first color and stitch it
Pick your first color and stitch all the occurrences of that stitch in the area that you've decided to work in.
Below is an image of what my stitching looks like when I complete the first color. You can see that I do not grid, I just count the spaces.
You can see that the loose thread is parked in the bottom right corner of where my next stitch will be made.

As I work my stitches, I start in the top left. And for this color, I know I'm going to park in the top row of the next box.
I map out a way to work on the stitches that might reduce me going back and forth and so I'll end up in the top right corner of my 10x10 block next to where I will park the thread.
The image below shows how I stitched this. This is a little "extra" and you could just stitch row by row and then carry the thread along the back to the space where you're going to park.
However, I like to try reduce my thread carry to hopefully reduce bulk.
I started at 1 and stitched along those stitches moving from left to right.
Then I came back in Row 2 and stitched those three stitches from right to left.
Row 3 was left to right.
Row 4 was stitched right to left.
Stitch 5 and 6 were completed and then I came back up to section 7.
I stitched 7 and 8 working upwards.
I finished with Stitch 9 and parked.
(The blue dashed lines show the borders for the 10x10 block.
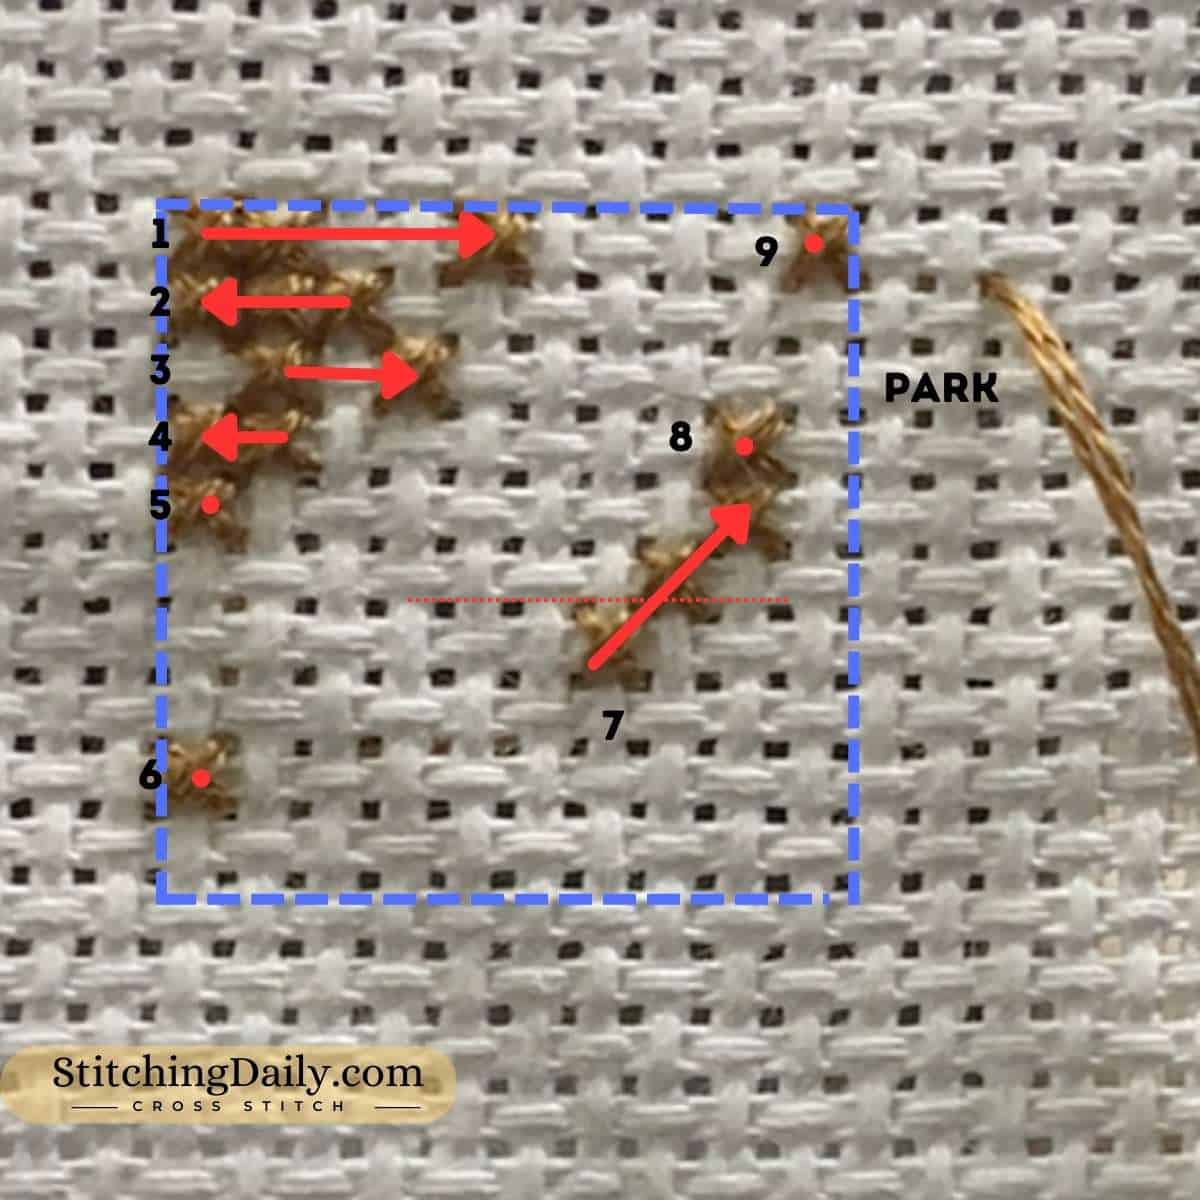
You can see from above that the way I mapped out my stitches reduced thread usage slightly.
Instead of stitching all the way across on Row 1 and then coming all the way back to the left edge for Row 2, I kept the threads on the left half of the square.
And then since I was going to bring my thread back up to the top to park it in the box to the right, I might as well save those stitches on the right side of the box and work them in as I made my way back up to the top.
Step 3. Park the first color in the next occurrence
Here is an image showing what the my project looks like after I have stitched all of Color 1 which is the symbol "K" in the first 10x10 block and parked the thread at the first occurrence in the 10x10 box to the right.
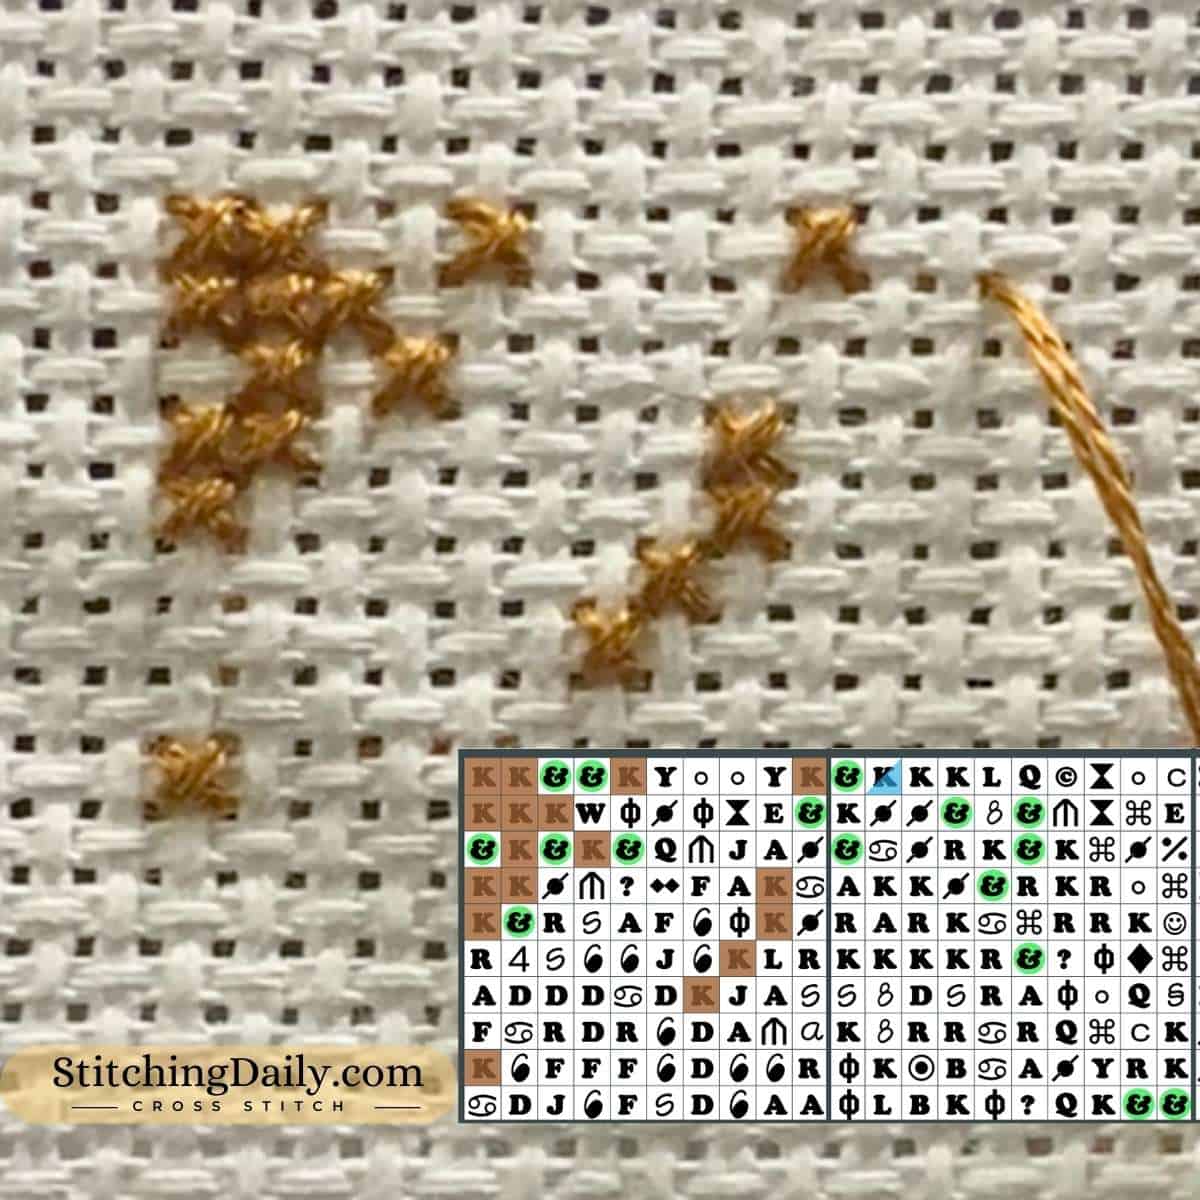
You can see in the image above, I stitched and parked the Gold color. The parked thread is noted in Pattern Keeper with half of the square highlighted.
I also have the second color symbol highlighted.
Again, this one is being parked at the top of the square, so I'll probably work down the left side of the box and come back up the right side and complete that stitch that's right under the K in the corner and park the thread right next to the K.
Step 4. Mark your stitches and where you parked your thread
The image above shows how I marked the completed stitches and the parked thread in the Pattern Keeper app.
If I was stitching from a paper chart, I might mark my completed stitches with a dark color (blue in the example) and my parked stitches in a lighter color that I could color over with something darker when I eventually stitch it. So I'm using a yellow marker to notate parked threads.
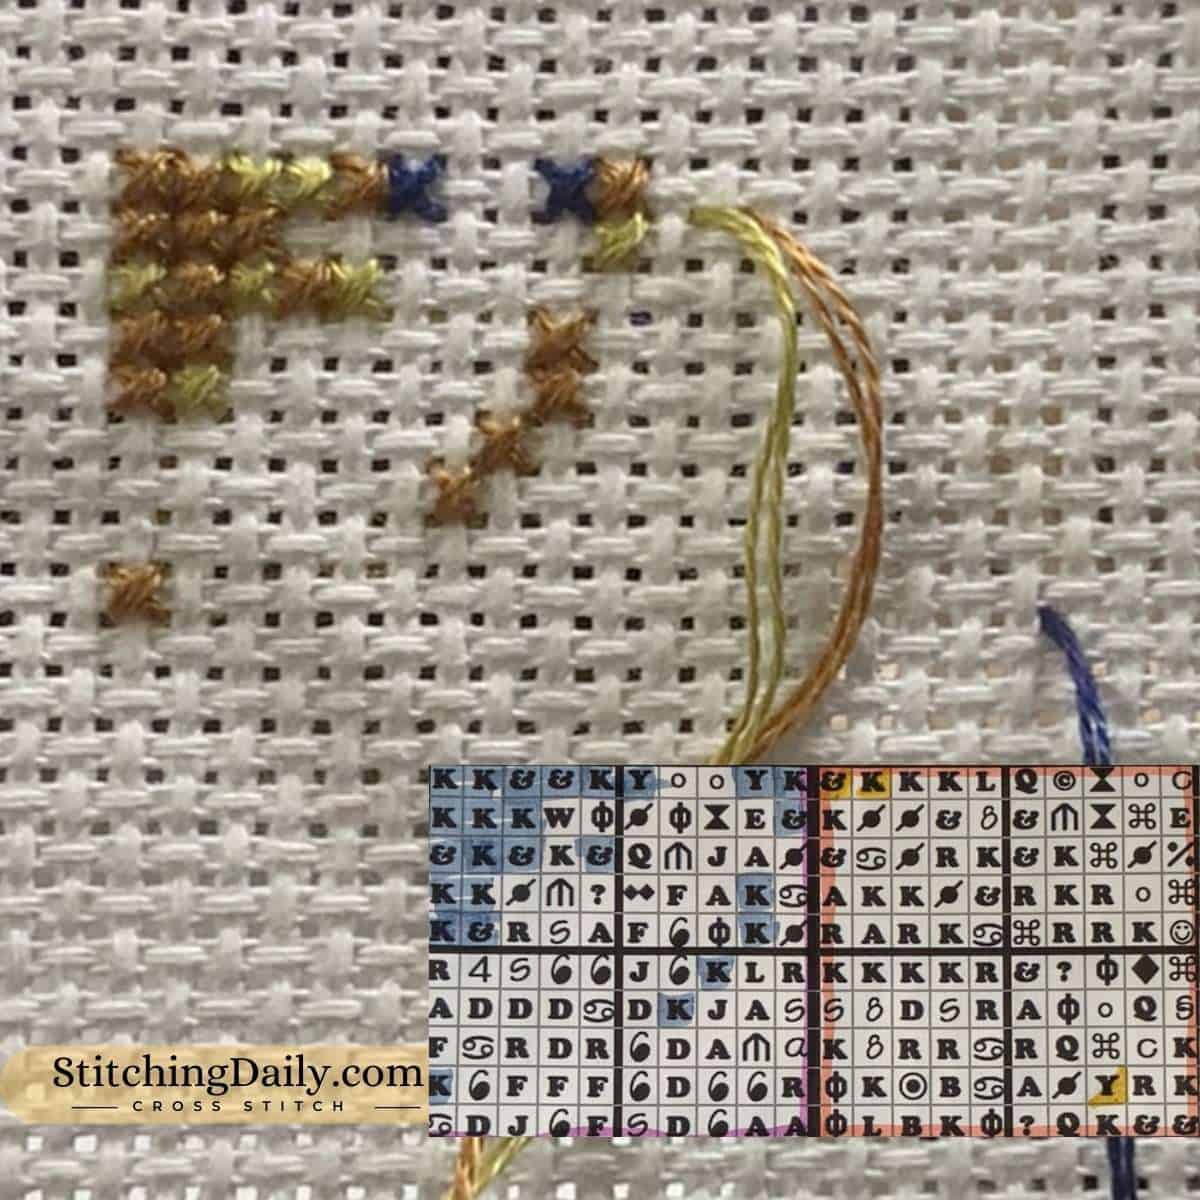
Below you can see what my project and my paper pattern would look like after stitching the first three colors (Gold was stitched first, yellow was the second color and blue was the third color I stitched.)
NOTE: When working from a paper pattern, I prefer to make a copy that is my "working copy" and I can color on it as much as I want. That way I can keep the original paper pattern unmarked and in good condition.
Also, when working from a pattern that is printed using an inkjet printer, you want to make sure that you test your highlighters. I've had some highlighters that ended up smudging the ink. That's not good because then the symbol gets smudged when you mark parked stitches. And that makes it hard to tell what the symbol is when you go to work in any parked threads.
Step 5. Repeat Steps 2 and 3 of picking your color, stitching, parking and marking
That's it. It's pretty simple.
The thing to remember is park in the same corner of your X and mark where you parked your thread. You do these steps and you'll save yourself a lot of headache!
Here is an image showing my stitching with the second color (the "&" symbol in the pattern) completed and the thread parked, and what it looks like on Pattern Keeper to mark the parked stitches.

Here is the third color stitched on my Aida fabric but showing how I would mark it on a paper pattern.
The third color ("Y" in the pattern) only has 2 stitches in the first 10 x 10 block, and then it doesn't show up until lower in the box to the right. But you can see how I highlight only half of the box to signify that I parked the thread in the lower right corner of the X.
There's No Wrong Way to Stitch
I just wanted to repeat, there is no wrong way to stitch. You will find what works best for you for the pattern you're working on.
My technique and decisions about how I stitch a cross stitch project are based on:
- How many colors there are
- What direction the colors seem to "flow"
- How often I want to switch colors
- What mood I'm in
- What methods I've watched on YouTube lately
I change my mind often and LOVE to try new ways to stitch.
Parking Method Cross Stitch YouTube Video
I have a YouTube video where I walk you through the process as I stitch my first 100 stitches on a new cross stitch project. The video shows some of the shortcuts I use in the Pattern Keeper app on my Amazon Fire Tablet.
Cross Stitch Parking Method FAQ
No, you do not have to use the parking method in every cross stitch project. I work some projects in cross country and others in a hybrid combination of the two.
Yes, you can use the parking method with any type of cross stitch project. However, since you're carrying the thread along the back from one stitch to the next occurrence of the stitch, you want to make sure that your threads aren't showing through if you're carrying them in a section where there's no stitching. For this reason, I only use parking for full coverage cross stitch projects.
As shown in my project, I do not grid. In fact, I use the parking method and stitch and park within a smaller space so I don't have to count too far. The most I'm counting is 20 stitches out.
I've messed up on my stitching with parking. If the area has lots of colors (high confetti) I usually don't fix it because I don't think one color in a rainbow of colors is going to be noticeable.
If it is noticeable because it's in a block of colors and it stands out, I will just stitch over with the correct color. I usually don't frog or undo my stitches because I probably have a web of threads behind it and frogging will cause a headache.
Other Parking Options
There's a different parking method that I'm trying and it's the Royal Rows Cross Stitch Method. I am enjoying trying it and finding what works best for me.
TIP: How to keep parked threads from tangling
To help prevent tangling, I do a few things.
Usually as I am stitching, I will straighten out threads as they're lying on my project and run my fingers through them to prevent any overlapping threads and tangles.
Also, I use these Bob-eez. I just wrap a few threads around them and it keeps them from tangling.
TIP: Do I need to use a hoop or frame?
When I'm just stitching for fun (and not recording), I will stitch in hand with my fabric rolled up. So I usually do not use a hoop or a frame and just hold the fabric or cloth in my hands.
Stitchers I've Learned From
I learned how to park by watching some great cross stitchers on YouTube. These videos were filmed years ago and my own style is sort of a combination of their techniques.
Here are links to a few of the videos I learned from:
Channel: The Flosstube Stitcher / Carolyn Mazzeo
Video: Cross Stitch #8 - My parking Technique (2014)
Channel: Sherry X Stitching
Video: Parking and Ending Threads Cross Stitch Tutorial (2017)
Channel: Needle Ninja
Video: Flosstube #76/Parking in 20x10 block/Not Tutorial, just how I do things (2021)
Channel: Blitstitch
Video: Floss Tube 36: Diagonal Stitching in Rows and Columns (2018)
Other Method to Stitch
The other method of stitching is called "Cross Country". This means that using one strand of floss, you stitch anywhere you see that symbol until that strand is used up.
If you carry your thread a long distance that is considered "Extreme cross country". Of course, the term "long distance" is up for interpretation. I usually only carry my thread 1 inch or up to 1.5 inches. Any stitch that is further than that, I will end my thread and start it new. So for me, I would consider it extreme if you're carrying your thread anything longer than 1.5 inches.
Another way to complete cross-stitch projects is to do color complete. By color completing, you are cross-stitching all of the instances of one color throughout the entire stitch pattern, and then you will switch to the second color.
Ask Me Any Questions!
I hope this has been helpful to explain the parking method technique. If you have any questions or tips to share, please leave a comment and I will reply and maybe add a follow up video or post to help answer your question!
Happy stitching!

Michelle Martin says
Your instructions for adding Google Play to to a Fire tablet was greatly appreciated. I am new to cross stitch And was having a very hard time And getting lost on a paper pattern with Areas that had few stitches. I had heard about pattern keeper And wanted to try the app. Your instructions made that so easy to figure out. I've now put my 1st pattern in to the trial Version And I am ecstatic! Thank you so much!