One cross stitch parking method that has a great name and seems to be taking the craft by storm is Royal Rows Method of cross stitch.
When stitching a full coverage cross stitch project, you can choose between the cross country method (working on one color or strand of thread at a time until it's complete) and the parking method (completing one smaller section at a time and parking threads in the next occurrence if it's outside of that designated area.)
But within these two methods there are also different ways to restrict your stitching area. You can complete a diagonal, column, row or block.
Royal Rows is one way of doing the parking method.
Basics of Royal Rows Parking Method
Alison Royal (@RoyalStitcher on YouTube) explained the method she uses for parking and has named it "Royal Rows". I love what she did there!
- Royal Rows is stitching in blocks of 10 across, 20 down called the tower.
- You pick one color, stitch all of it in the tower and park in the 10x20 block below called the dungeon.
- If the color is not used in the dungeon, you look in the tower to the right, called the east tower and park it there in the first occurrence of the color there.
- If the color is not in the dungeon or east tower, you end the thread.
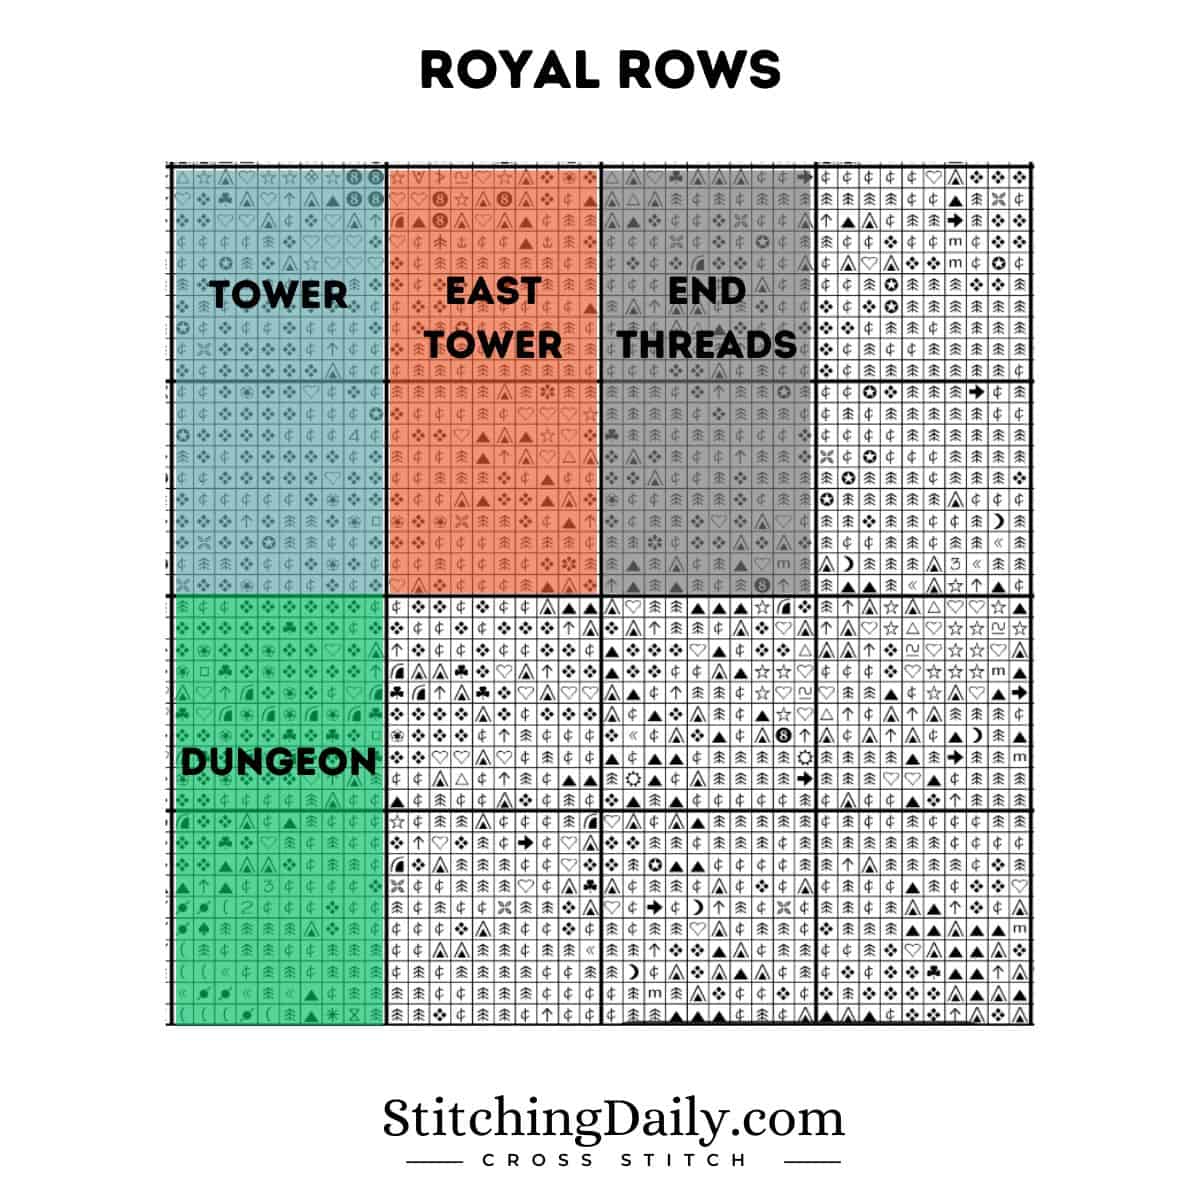
Royal Rows Terminology
I think part of the fun of royal rows is learning the terminology. Here's some of the terminology Alison refers to in her tutorial videos:
Tower - The 10 column x 20 row section you are currently stitching.
Dungeon - The 10 column x 20 row section below your tower where you first look to park.
East Tower - The 10 column x 20 row section to the right of your tower which is your second option for parking threads.
Cannonball - AKA ninja stitch - one little lonely stitch all by itself.
Rebel - A stitcher who parks in a space other than the dungeon or the east tower
Stitching the Royal Rows Method
Stitching the First Color in Royal Rows
- Start with the color in the square in the top left corner of your pattern.
- Stitch all instances of the color across the top row making complete Xs.
- Go across Row 2, Row 3, etc.
- You choose how you work down the tower. You can go in a snake method or from right to left.
- In the snake method - you work threads from right to left for Row 1.
For Row 2, you work left to right.
For Row 3, you work right to left, etc. - For the Left to right method, you work all rows left to right.
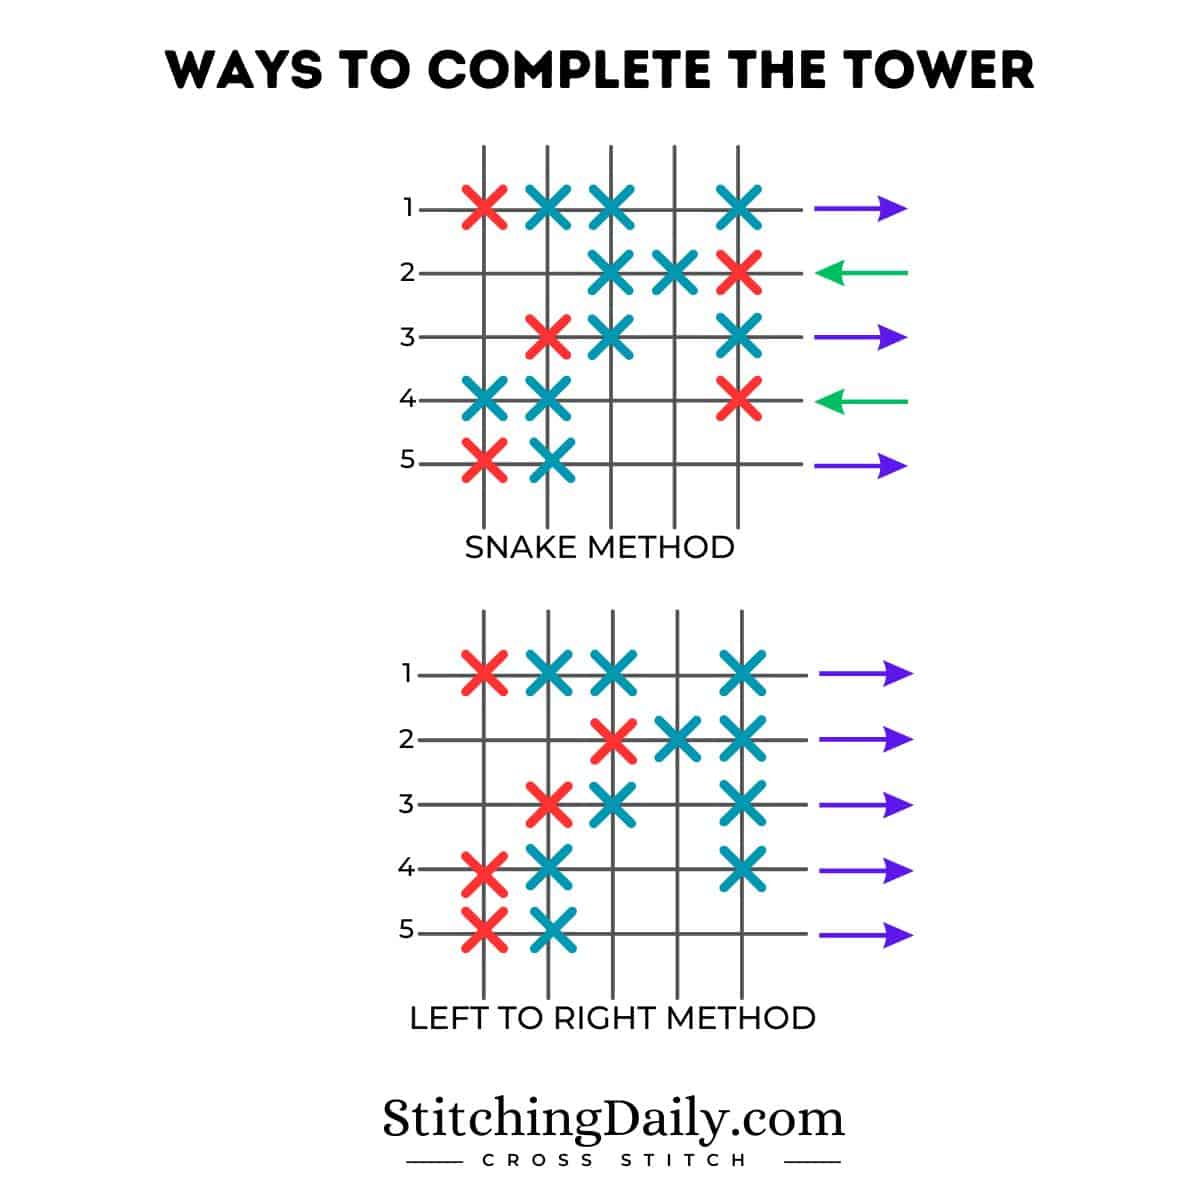
- When you're done stitching all instances of your color in the tower, you will choose one of the following:
- Park in the Dungeon
- Park in the East Tower
- End your thread
NOTE: You park by bringing your thread from the back of your work to the front like you are going to stitch the first leg. But instead of stitching it, you remove your needle and just let the thread hang down in the front.
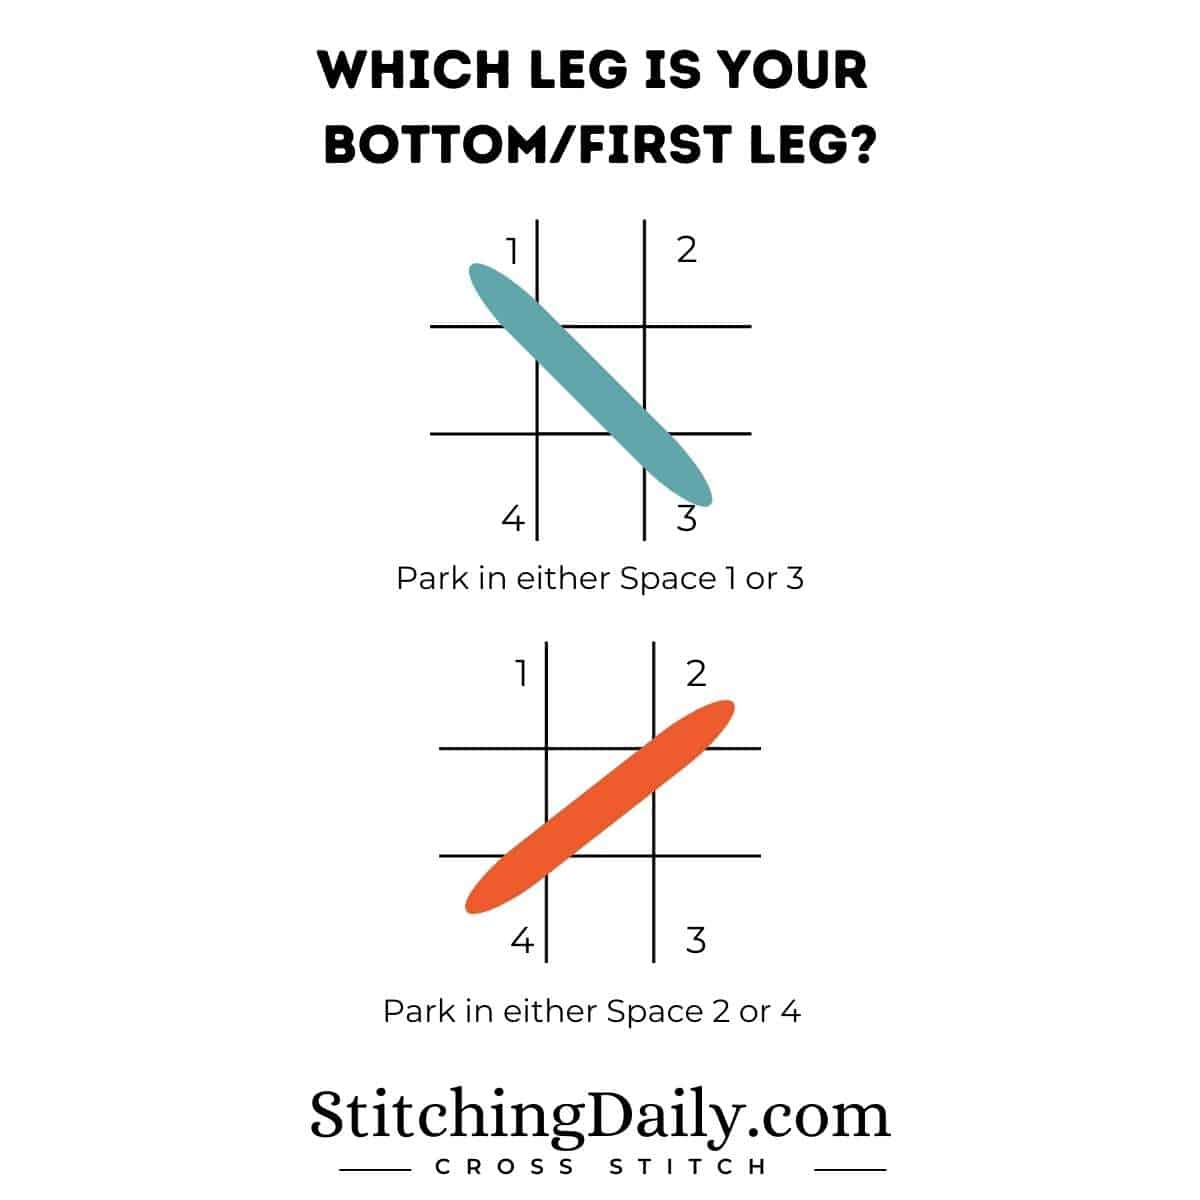
Stitching a Section that Has Parked Threads
After you are done stitching all the squares in the Tower, you are ready to move to your next 10 column by 20 row block to the right. This section had earlier been referred to as the East Tower.
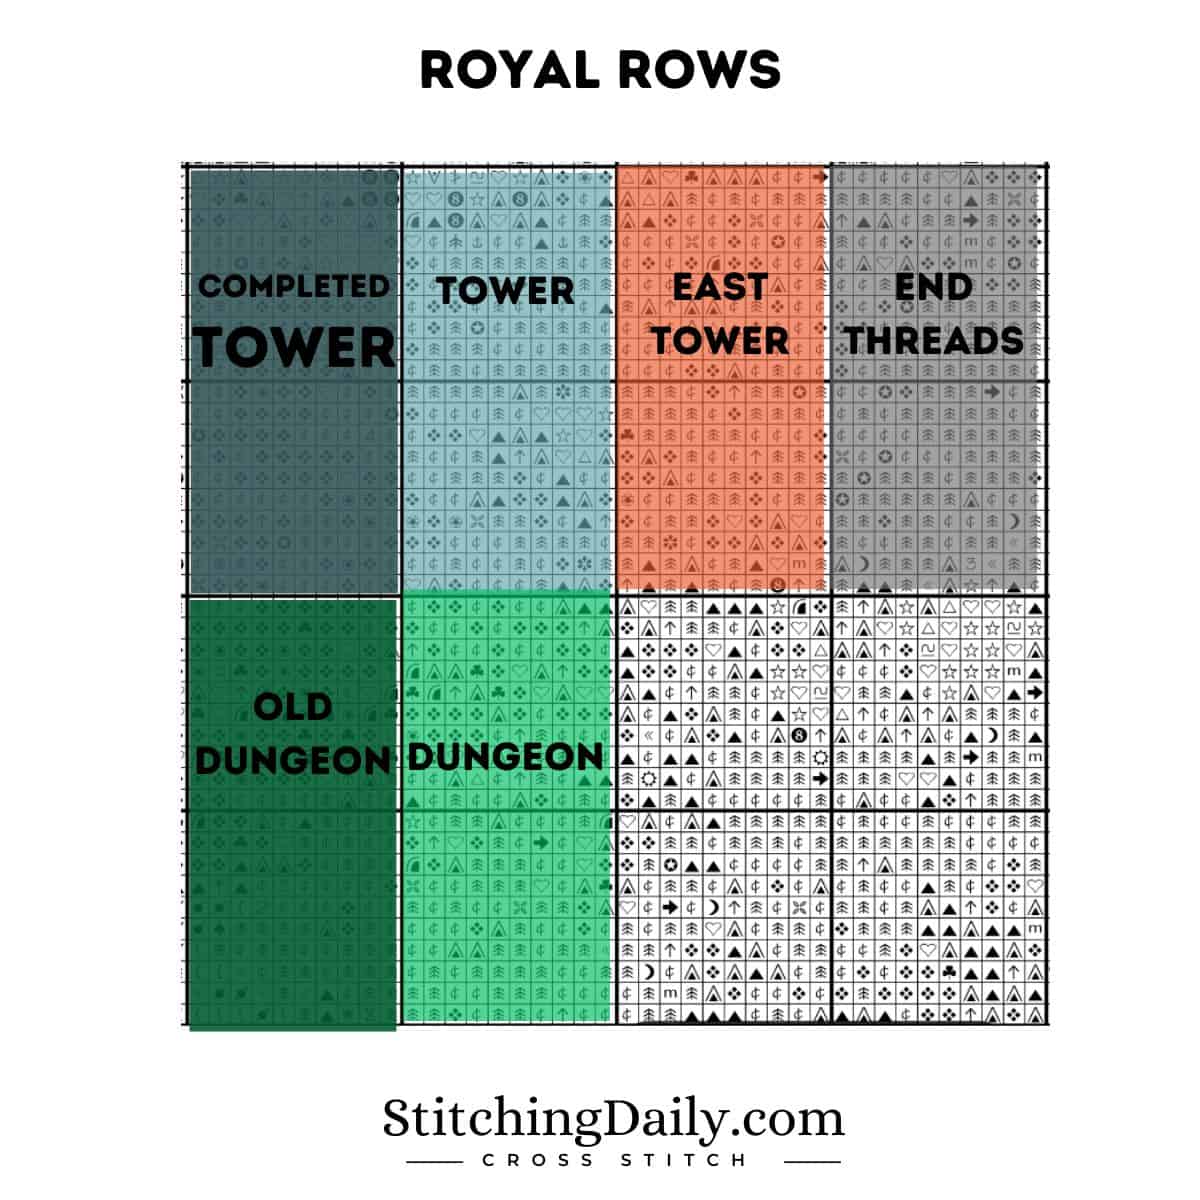
When it's time to stitch Tower #2, you will probably have some threads that you parked there.
- Move all your parked threads to the top of your stitching fabric so they're out of your way when you go to stitch.
- Pick the parked thread that's furthest to the bottom of your block.
- Stitch all instances of that color in your tower.
- When all instances of the color in the tower are stitched you will choose to:
- Park in the dungeon
- Park in the new east tower
- End the thread
- When all parked threads in the tower have been stitched, you will then start with the empty space further in the top left, and stitch all of that color and continue with the next color.
Ending Your Thread in Royal Rows
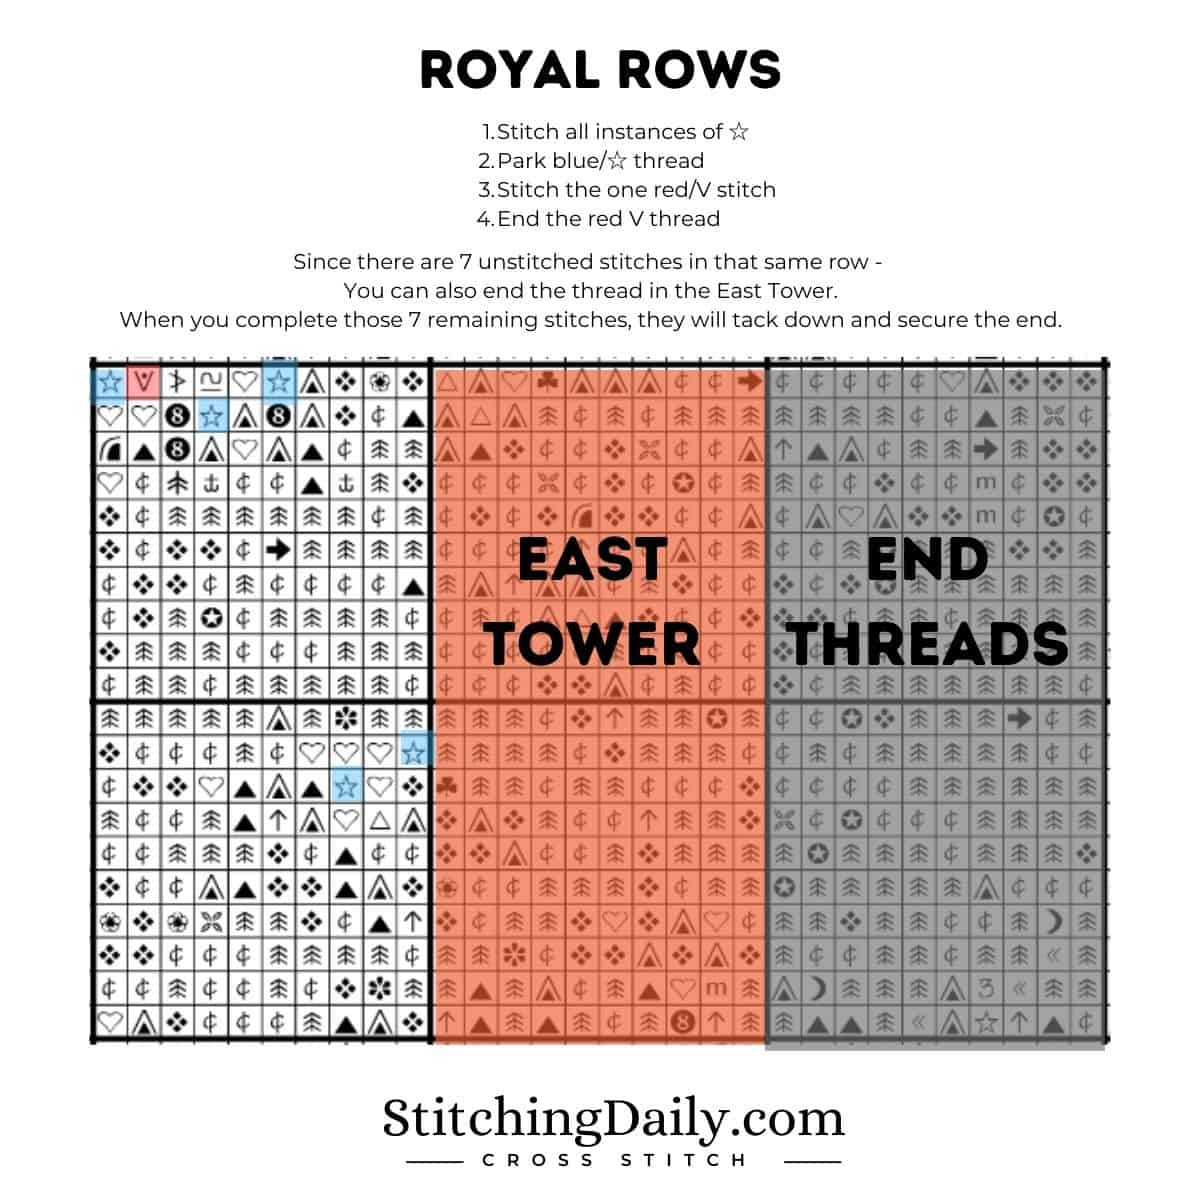
You will end your thread to the right of your stitching area.
Go past the East Tower and into the tower next to that. Just pull your thread from the back to the front and remove the needle - the same way you'd do if you were parking a thread.
It doesn't matter which hole you come up through, just try to space out your tails the entire length of the tower so they aren't clumped in one area.
Snip the end tail. Leave the tail hanging out the front.
As you stitch the East Tower, you will be stitching over the tails that are running along the back. This will ensure that the thread gets locked in and the stitches don't come undone.
Reason to run your end threads to the right
By ending to the right, you also decrease the chances of having vertical lines.
With this parking method, your tension is going in two directions.
First, some of your tension is going downwards as you are parking below and pull your threads that direction.
Second, tension is going to the right as you pull your threads that direction to end them.
How to Complete your Project in Royal Rows
Keep working from the left to right working in 10 column by 20 row blocks.
Work across the entire width of your project.
Once you have completed the first row of blocks, you will go back to the left and start the second row of 10x20 blocks.
Royal Rows Tips
Here are a few tips that Alison mentions in her Royal Rows videos.
Ending your thread Option B
If you're stitching in a tower you can end a thread in the east tower just to the right if you still have stitches to complete in your row that might anchor down that thread. Otherwise, pull the thread two towers over and end it there.
Don't snip your threads all the same length
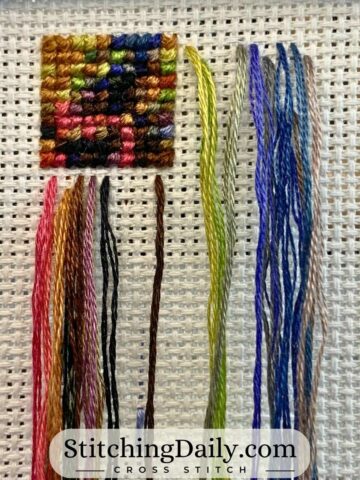
If you vary the lengths of your snipped end tails, then you won't have an obvious ridge of end tails. Instead, they will be varied which will give you a more even back.
Use an app to keep track of completed stitches and parked threads
I use Pattern Keeper and so does Alison Royal. Pattern Keeper is an Android app, but I use Pattern Keeper on my Amazon Fire Tablet. But you can just as easily use Markup R-XP on iOS or even just mark your threads on your paper pattern.
Royal Rows FAQ
If a color is needed in both, you will park it in the dungeon and start a new thread when you go to stitch the east tower.
When you have finished your tower that is anchoring down the tails, you push the tails to the back using a tool like a Snag Nab-It.
Go ahead and park your thread in the same hole. When you are ready to work that tower, just hold your parked thread and use your Snag Nab-It to gently push the end tail to the back of your work and snip it.
If your Snag Nab-It isn't grabbing your end tail thread, try roughing it up with sandpaper or a nail file and see if that helps.
I love using these plastic little things called Bob-EEZ. They're inexpensive on Amazon for a pack of 32. On any one project, I only have to use a few, maybe 4 or 5.
You don't. Those are all wonderful tools, but I am stitching this method and I stitch in hand.
You do not have to grid your fabric. I am stitching on pre-gridded evenweave fabric. But I think this method actually reduces the need to grid because you're only ever working in your current tower, the dungeon or the east tower. So at the most, your working area is 20 columns by 40 rows.
To connect with other Royal Rows fans, you can use the hashtag #RoyalRows on social media. There are also two Facebook groups that are dedicated to this method:
All Things CrossStitch RoyalStitcher and #royalrows group.
Benefits of Royal Rows Stitching
There are definitely some advantages to Royal Rows Method of Cross Stitching.
I've only been using this method for a few boxes in my newest start; but some of the advantages I see are:
- It takes away the decision making. There's a set method for where to stitch, where to park, when to end your threads.
- The 10 column by 20 row block is a great size so you can get some stitching done without parking too frequently and you can see some progress.
- There's a whole community on Facebook, YouTube and social media all stitching this way and also as a resource if you have any questions.
- There is a reduced chance of getting lines or warped fabric because you are primarily parking in one direction (down the column block) and ending threads in another direction (to the right of the block you are working).
My thoughts on using this parking method for cross stitching
I love this method but it's not completely new to me. I see similarities to ways that other cross stitchers do their parking.
Royal Rows and Typewriter Cross Stitch Method
The method of picking the first color in the top left and then going across to the right and starting back on the left, that is similar to the typewriter method explained by Sarah the Stitchin' Mommy. Here's a video where I use this method to pick the next color I work.
Royal Rows and Needle Ninja's Crossstitch Method
One of the first flosstubers whose method of parking made sense to me was Needle Ninja. She has a video called Parking in 20 x 10 block, Not TUTORIAL, just how I do things.
Her method is similar to Royal Rows as she works in a block (Needle Ninja is 20 columns by 10 rows versus Royal Rows 10x20.
Both Royal Rows and Needle Ninja work in their parked threads starting from the bottom and working up.
Needle Ninja also parks in the block below the block she's currently working in.
I prefer Royal Rows method of ending threads to the right of your current working block. I think that's better than below along with the parked threads.
Royal Rows vs Cross Country
Royal Rows is a way to do the parking method and it goes back to the age old parking versus cross country.
There is no one method that is better than the other. The best method is the one that works best for you.
Personally, I have found that I prefer parking because I like to see my picture develop quicker and I don't like all the counting because I often make counting mistakes.
So for me, I think you'll always see me doing parking.
I think I'll keep doing Royal Rows. It's possible I might switch things up and try a different size of block, but the 10x20 block works fine for me now and I'm happy to keep using that method.



Patricia carluccio
I am trying to work with my fire HD8 and I got lost in your direction sorry I am really no good at this stuff can you help me I typing this on my I pad but I want to buy patternkeeper an use it on my fire 8 I got getting to allow to say ok for the thing to open but then it got stupid on me or I did anyway can you help?????????? Patricia
Rebecca
Hi Patricia, I'm happy to try to help!
Are you on Step 3 from the install post? (https://stitchingdaily.com/install-pattern-keeper-on-amazon-fire-tablet/#3-install-downloaded-files-in-order)
My instructions might be outdated, so I'll try to go back through the process and see if any of the steps have changed!
Traci
This is the best explanation I’ve seen on Royal Rows so far. Thanks so much!
Danielle
Thank you so much for writing this article! It was very clear and easy to refer to as I got started on my first project using Royal Rows. ❤️
Rob
Thanks for the detailed explanation. I watched several videos on this and they can be quite confusing but your explanation of everything made perfect sense!